Tools Used
- OPNsense Firewall
- Web GUI access
- Cisco Catalyst-style switch from Lab 1
- Browser + screenshot tool
Steps Taken
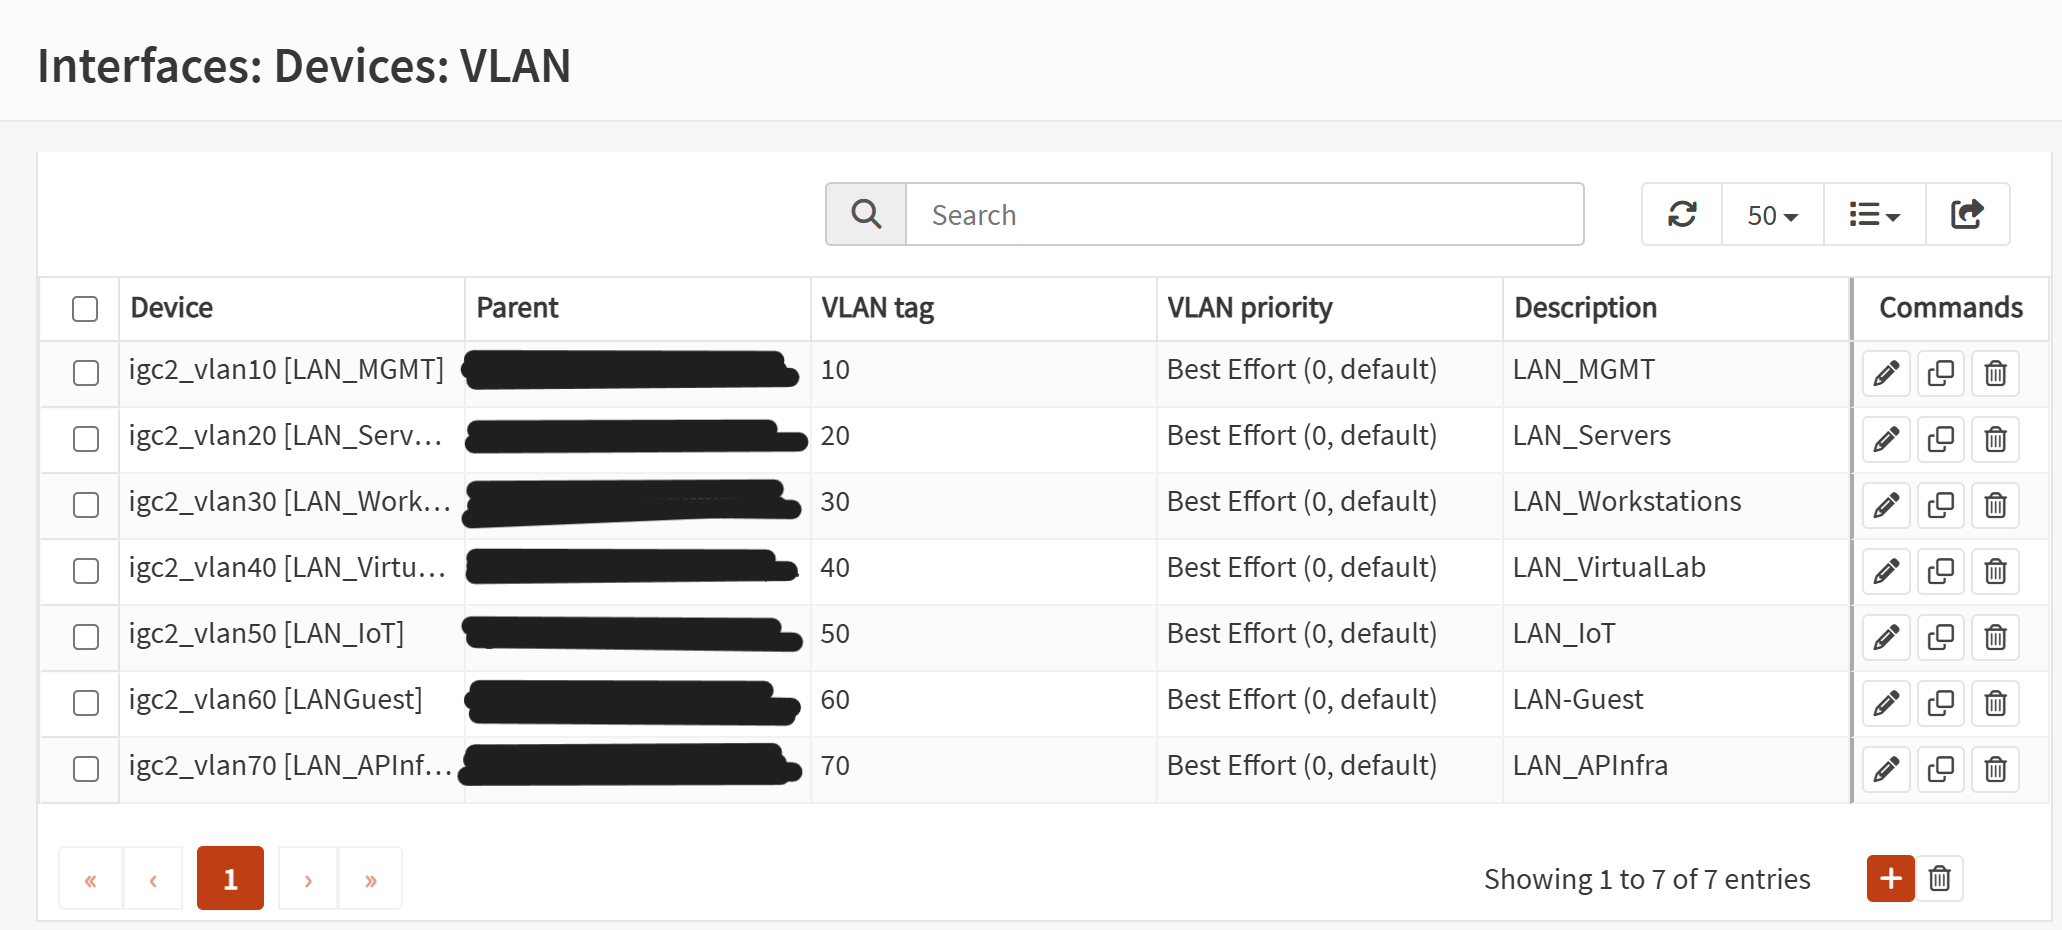
- Created VLAN entries under Interfaces → Other Types → VLAN for VLANs 10–70.
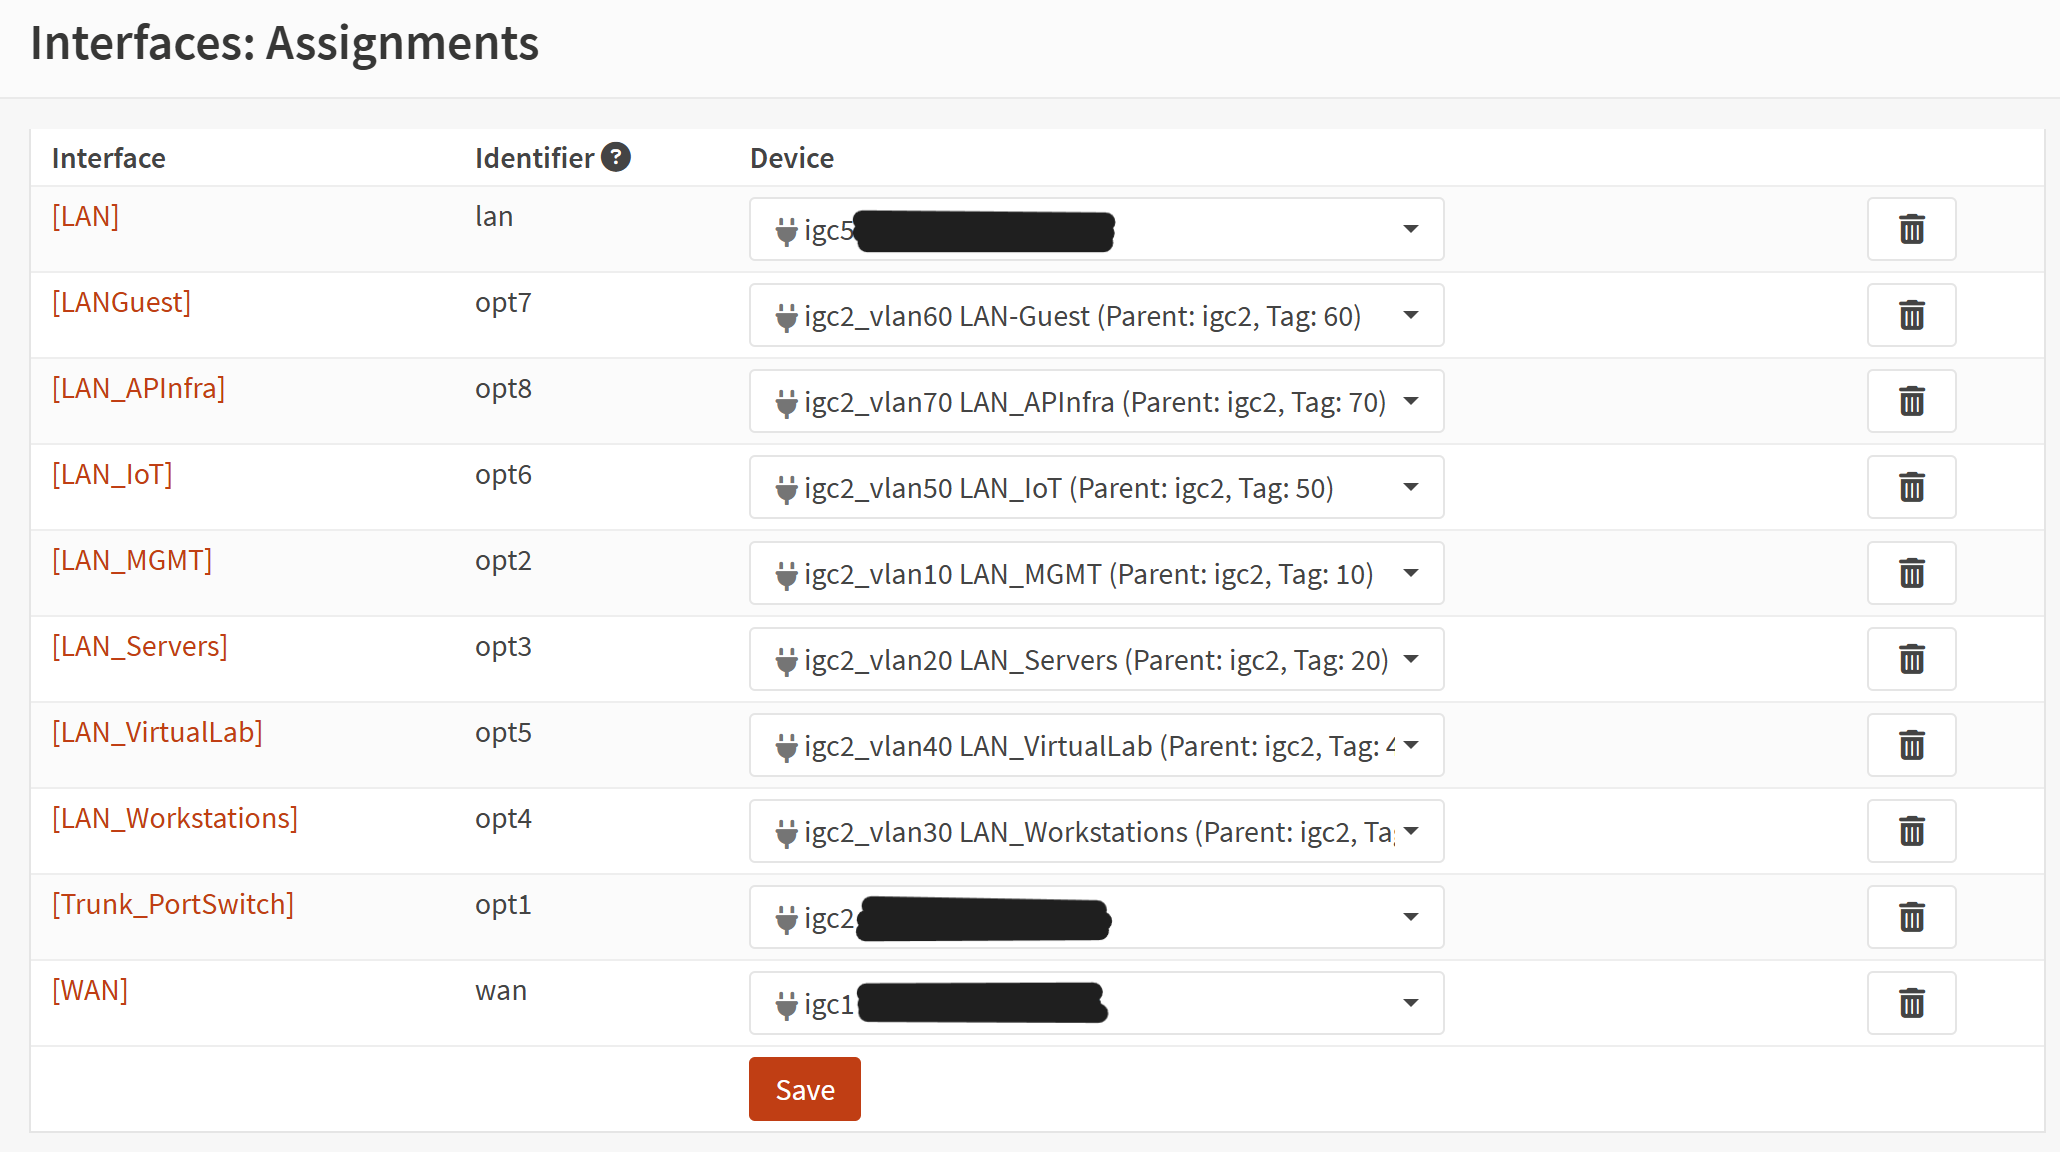
- Assigned each VLAN to an OPT interface under Interfaces → Assignments.
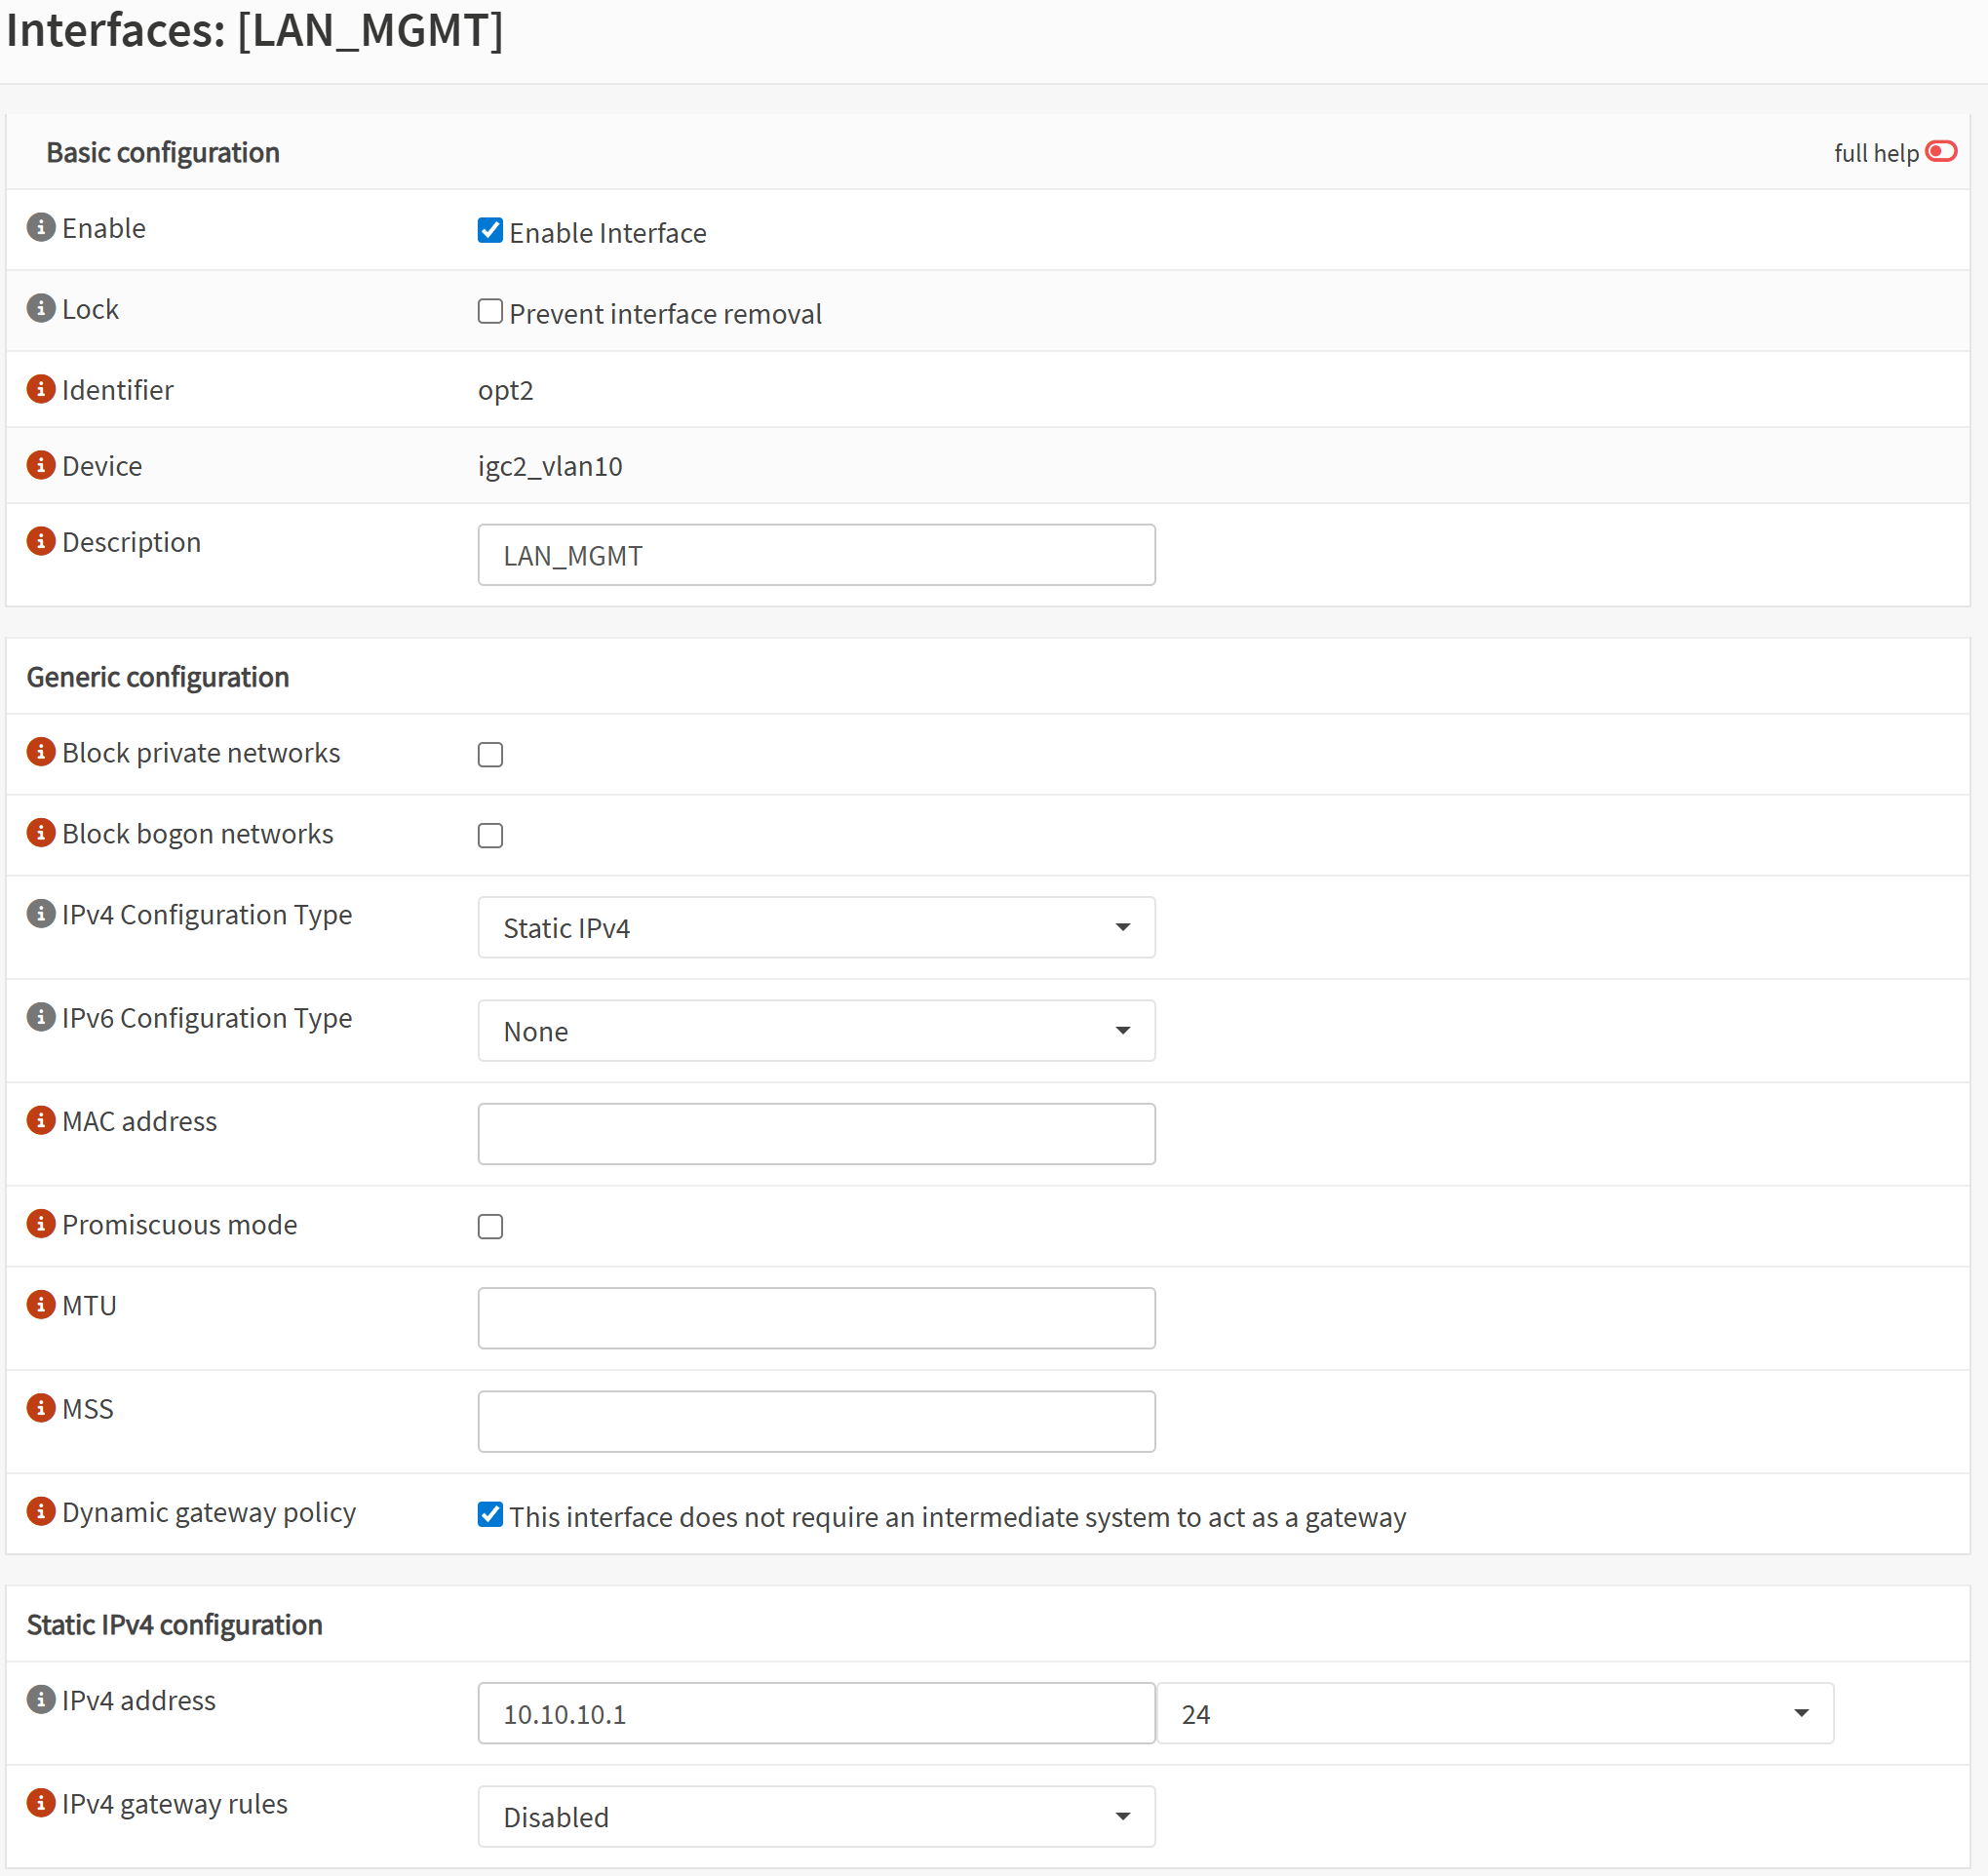
- Enabled each interface and configured static IPv4 gateway addresses.
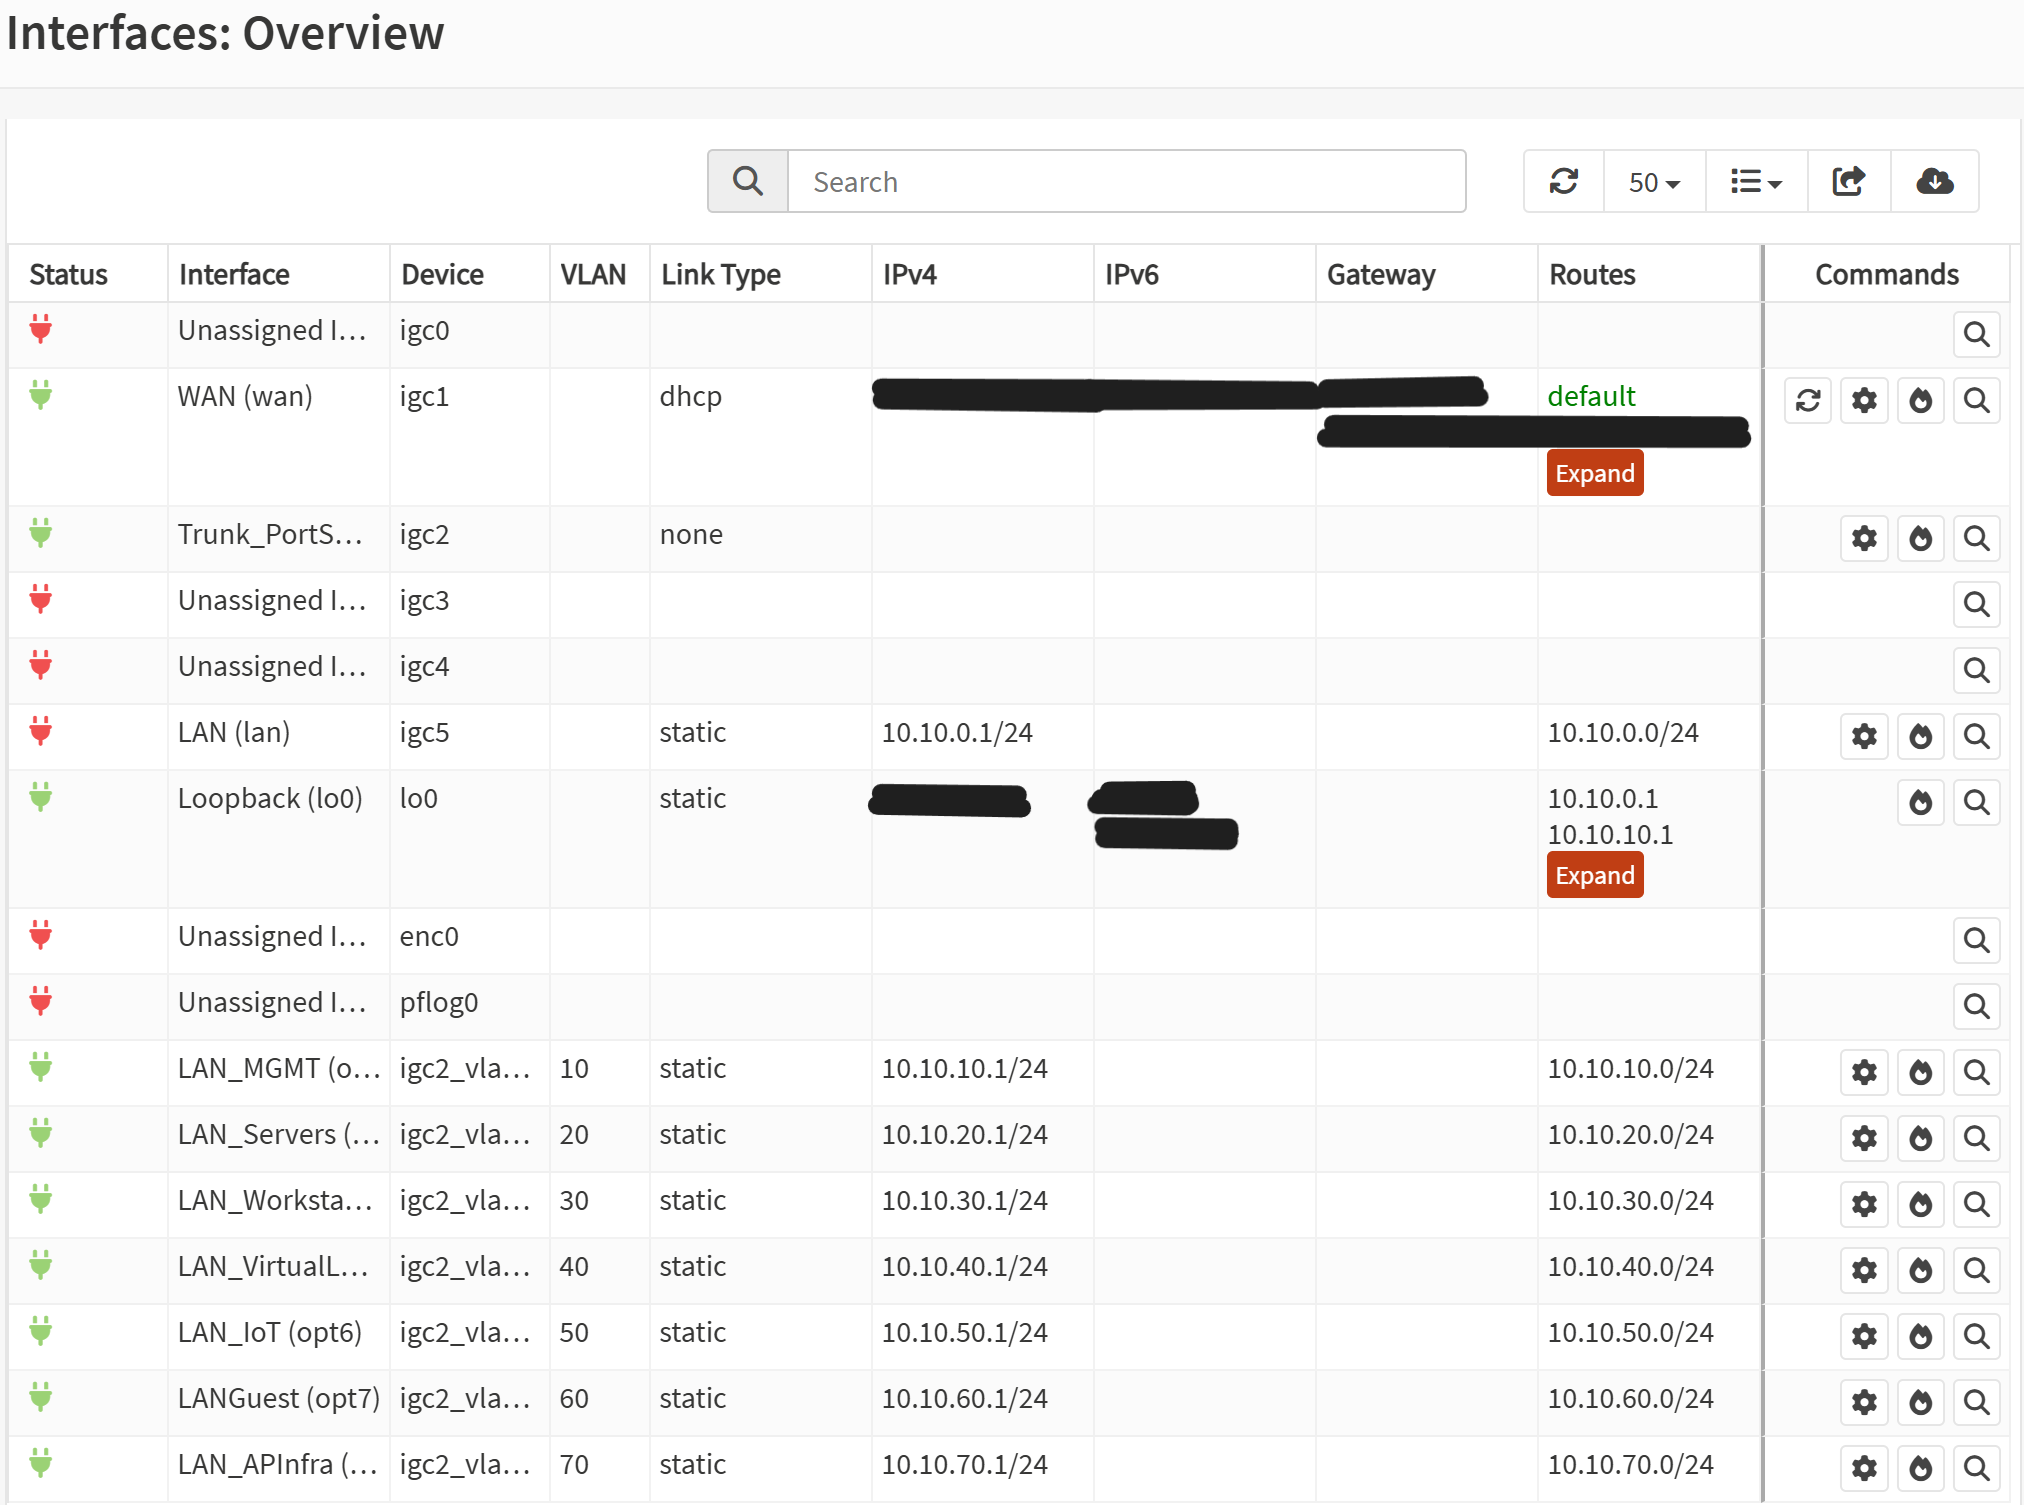
- Applied changes and verified interface status.
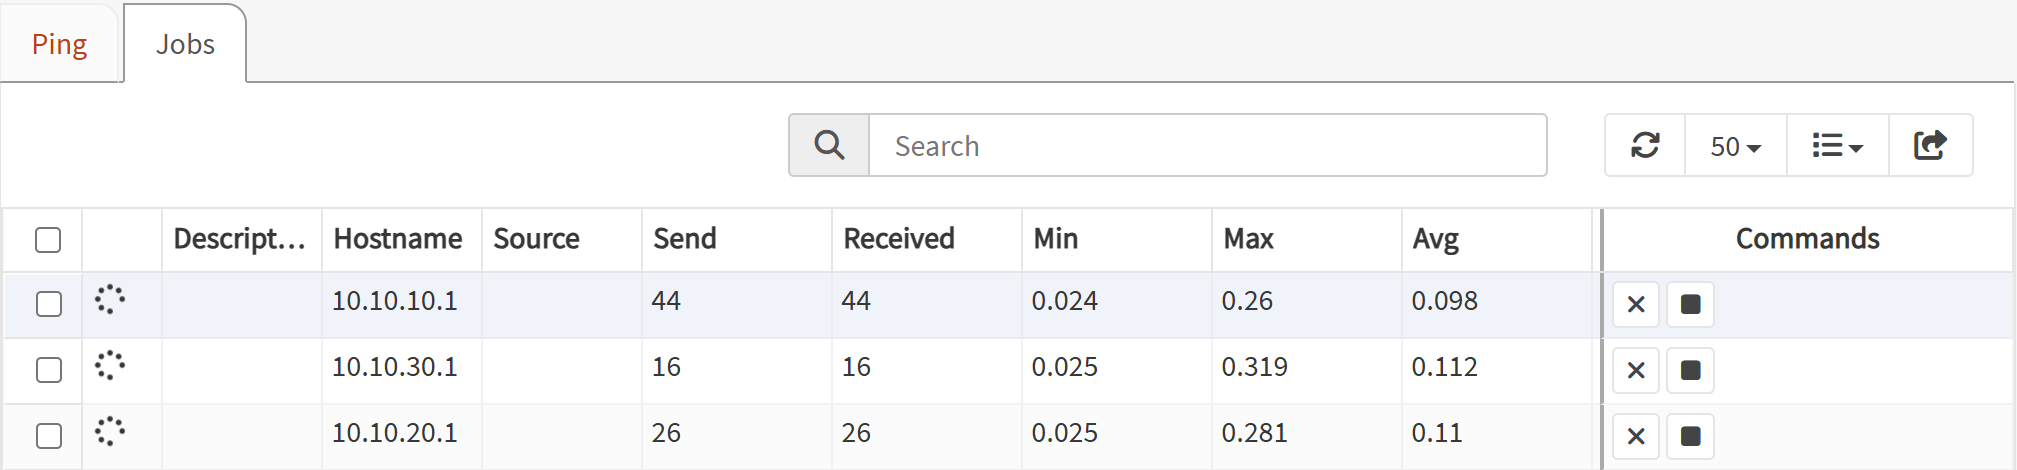
- Validated connectivity using OPNsense diagnostics (pinging each gateway IP).
Screenshot: VLAN Definitions
Screenshot: Interface Assignments
Screenshot: Interface Configuration
Screenshot: Interface Status
Screenshot: Ping Validation
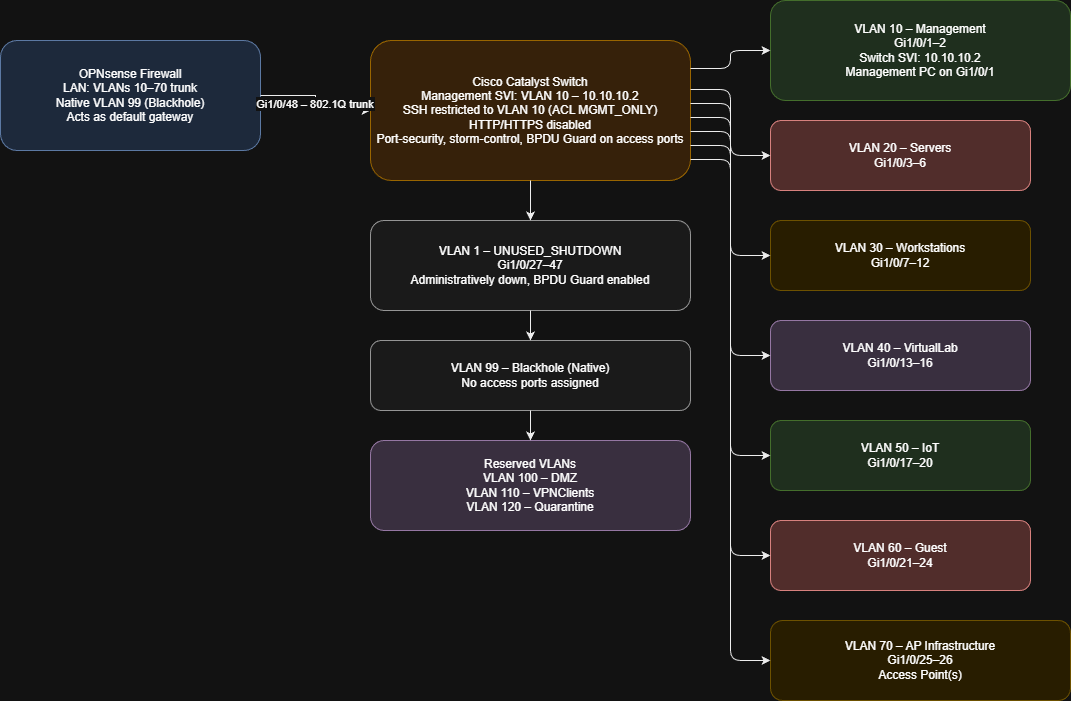
Network Diagram
Outcome
All VLAN interfaces are now active on OPNsense with correct IP assignments and verified operational status. This completes the firewall-side foundation for the segmented network created the switch config lab. With VLANs online and reachable, the next step will be configuring DHCP scopes for each network segment.